
This will essentially create a VPN(Private Virtual Network) via SSH. It will allow you to access web pages that otherwise only are accessible from within the local network or browse the internet looking like you are on your home IP address. Why is this useful? Well, I’ll tell you what I use it for.
- Accessing a local webserver on my home network.
- Accessing my Fileservers web interface for managing it
- Open a port on my router. This has come in very handy a couple of times.
- Getting the IP address of your network at home is very handy, if you’re for example is traveling in another country and want to watch the local TV station and the TV station blogs IP from other countries it will look like you are coming from your own IP and you can watch all the TV you want.
I am sure there are other use cases for this, but this is what I use it for. Now here is how it’s done and it’s actually quite easy.
Terminal (Linux)#
If you are using SSH from the terminal then the command looks like this.
ssh -N -D somePort YourUsername@YourServer.comThe parameters used are explained in short below. For further information on SSH visit the Open SSH manual.
-N = Do not execute a remote command. This is useful for just forwarding ports (protocol version 2 only).
-D = Specifies a local “dynamic” application-level port forwarding.
Putty (Linux and Windows)#
Putty is a free open source terminal emulator and a very nice SSH client that work on both Linux and Windows.
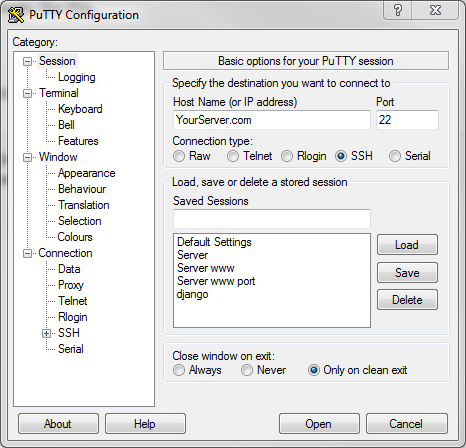
Set host name to YourServerName.com and port to 22
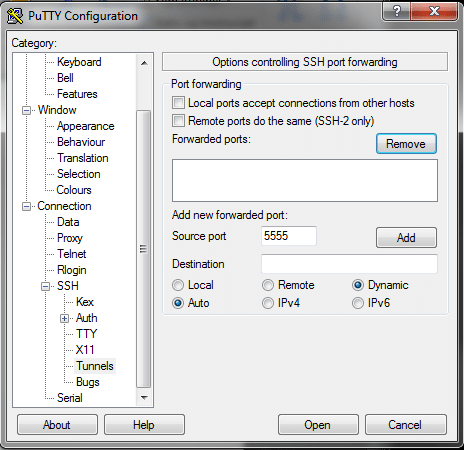
Select SSH then Tunnels from category.
Set Source port to some random port here I have used 5555.
Select Dynamic and Auto.
Select Add.
That’s it. If you want to save the settings navigate to the main page by selecting Session from the category. Give the session a name and press save.
Now to tell the browser to route all traffic via our tunnel we have to make some settings.
Open Firefox.
Go to options/advanced/network
In the connection section select settings.
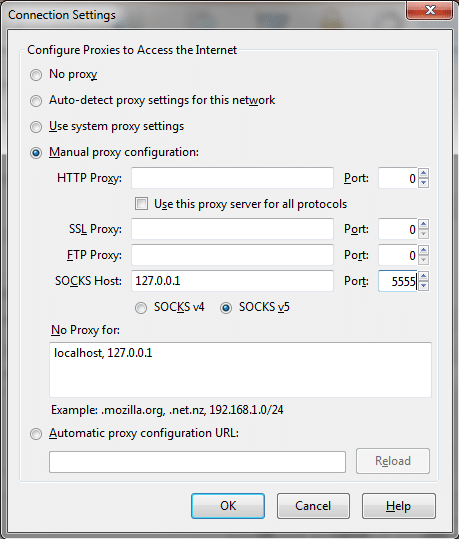
Select manual proxy configuration.
- SOCKS Host: 127.0.0.1
- port: set the port to what you choose. In the example, I choose 5555
- Select SOCKS v5 and press OK.
I use the Firefox extension Elite Proxy Switcher to easily turn the proxy on and off. That’s it you are now on your local network.