
This is not a tutorial but more a story of how, why, and with what I build my traditional Danish woodworking workbench.
The first big project I made in the shop was a door. Doing that project, it became clear that I needed a proper workbench. I was using a small workbench for kids because that was what I had.
How I Got the Hardware#
The previous owner of our house left an old woodworking workbench. However, it was in really bad shape. It had been used for everything but woodworking and was soaked in motor oil and other bad-smelling things. It also had a lot of nails and big holes in it. So, yeah it was in really bad shape. But, the hardware was in perfect working order and could be used on another workbench.
I sadly do not have images of the old workbench because, well I never thought I would start writing about woodworking on my blog. I’ll make sure to document future projects for this blog. I do however have some images of the new workbench doing the build because I shared them on Instagram.
Looking other workbenches#
The workbench I really wanted was the traditional Danish woodworking workbench. But, since that is made from hardwood (typically beech) it would be quite expensive. I had a very low budget and while I would prefer to make a workbench in hardwood I barely had the budget to buy softwood. For a while, I looked at different styles of woodworking workbenches made with softwood-like construction lumber. I did find a few that I considered making. The most interesting of them was Jay Bates workbench which is a quite simple workbench to build made from construction lumber. However, I also look at other workbenches:
- Jay Bates workbench
- Stumpy Nubs Roubo Workbench
- Kings Fine Woodworking Workbench
- Crafted Workshop Workbench
I did think a lot about this because the easy and cheap solution was to build one of the benches on the list. But, I already had a lot of experience using a traditional Danish woodworking workbench, and while I am sure all the workbenches on the list are great workbenches they are all American-style woodworking workbenches. And I just wanted what I already knew would work for me.
How I Got the Wood#
I did have some hardwood. I got quite a few mahogany stair steps that had never been used back in, I think, 2009 for free. The dimension of the steps varied a bit, but they were about 70 x 30 x 5 cm. (27 x 12 x 2) inches.
My father-in-law is a volunteer and a local recycling center. This recycling center has its own thrift store. My family and I were visiting the store and I came across a dining table and a coffee table in oak with a very low price. After given it some thought I bought the two tables to make the workbench tabletop out of.
It was when I saw the two tables in the thrift store that I realized that combining the wood from the stair steps and the tables their wood properly be enough hardwood to make a workbench. This is when I realized that I could build a traditional Danish woodworking workbench on my budget. And that’s what I did.
The Build#
The Benchtop#
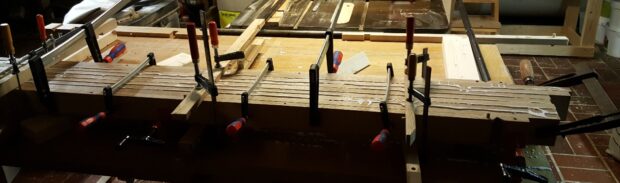
I started the build by making the benchtop. I ripped the oak tables into strips of little over 7,5 cm. (3 inches) and started gluing them together. This way I would get a benchtop with a thickness of 7,5 cm. (3 inches).

While the benchtop was drying I cut the mahogany stair steps into strips of 10 cm. (4 inches), 1 inch thicker than the benchtop. The mahogany stair steps were only about 70 cm (27 inches) long. So, I had to glue some of them together to make them longer. I did so by gluing them together with half-lap joints.
The Frame#
After the benchtop was all glued up and dry I started to frame it in with mahogany so that I would have an oak benchtop with a mahogany frame. Only the two long mahogany sides are glued to the oak. The two ends are fastened with lag bolts to allow for wood movement. The mahogany frame is joined together with half-blind dovetails because it looks nice.
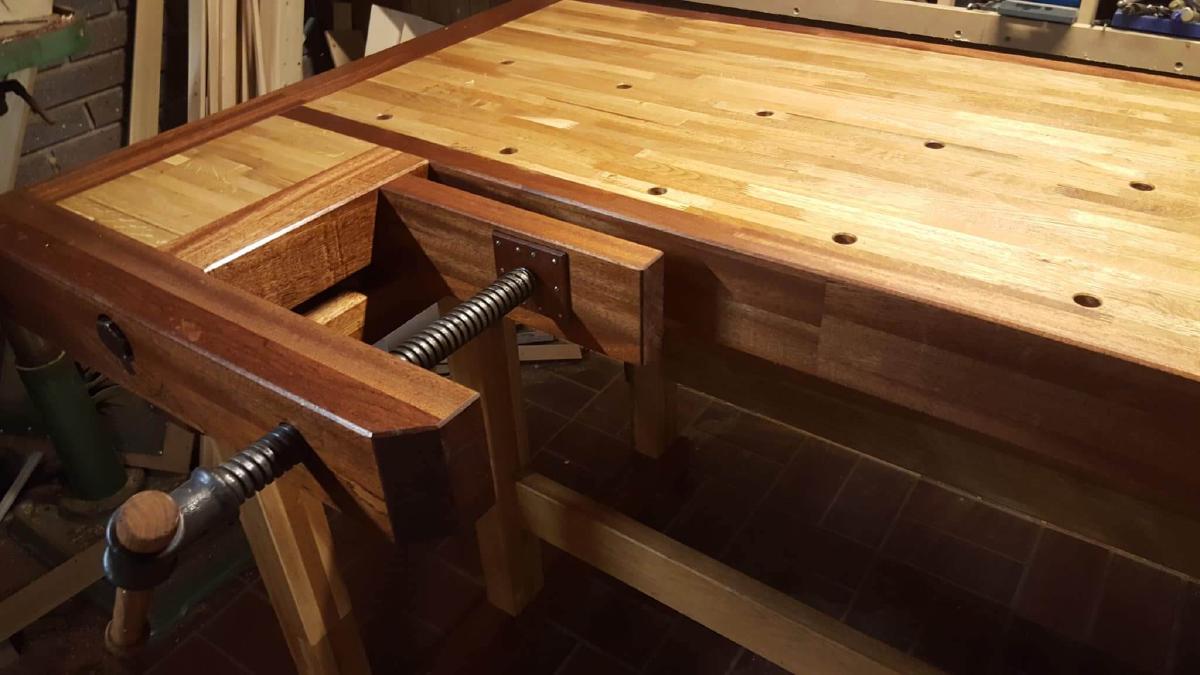
The Shoulder Vice#
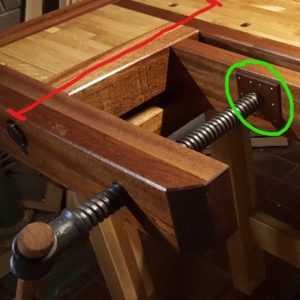
One unique feature of the traditional Danish woodworking workbench is the shoulder vice. There is a big bolt going from the outer part into about 15 cm into the oak part of the benchtop. I have attempted to illustrate that in the image above with a red line. This bolt is there to take the pressure when you fasten something in the vice. The oak panel just left of the red line is thinner than the oak benchtop. It is about 2,5 cm. (1 inch) thick and floating in groves on all 4 sides. Usually, there is a big cast ion piece to spread the pressure from the screw to the vice wood block. See the green circle on the image. However, this part was missing from the old workbench. This piece of cast iron also makes the woodblock follow the screw back and forth.
So, I had to come up with another way of spreading the load from the screw. I bored a hole in the woodblock and placed a thick washer in the bottom for the screw to press on. And finished it with two thin mahogany wood pieces with a hole in the middle that fits in a recess in the screw that makes the woodblock follow the screw. I hope this makes sense.

The End vice#
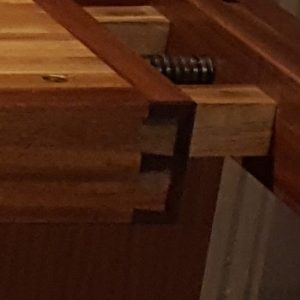
The end vice was quite easy to make. It is just a wooden version of a metal vice. The vice consists of a big screw connected to a big block of wood. The woodblock has two wood guide bars going into the benchtop to make the end woodblock stay horizontal and take some of the pressure when using the vice. I joint the guide bars to the vice block with wedge-through mortises to make it look nice.
The legs#
With the benchtop all done I went on to the legs. The horizontal piece in the top and bottom I made of mahogany and the vertical piece I made from the legs of the two oak tables. The end with the shoulder vice is wider than the other and has 3 vertical pieces. See image. The two legs a connected with two long oak boards that are through mortise and fasten with mahogany wedges through the oak boards. This makes it possible to disassemble the legs.
Then it was just a matter of lifting the insanely heavy benchtop up on the legs and bore all the dog holes. Then I give it a couple of coats of kitchen table oil and it was all done.
The Finished Workbench#
If you know your woodworking workbenches you will know that I did change a few things from the traditional woodworking workbench. First, I made the workbench quite high. Second, I remove the shelve that is usually in the back part of the benchtop and made my benchtop the full width.

It was never my intention to build such a beautiful piece of shop furniture. However, it just sort of happened. It was such a fun build and I had an absolute blast building it. I use it almost every day and I love it.
I did mention that I had a tight budget. The price of this awesome workbench was amazingly under 800 KR. about (125$) everything included.